User Manual
Shellfish Harvest Extent Latitude, Longitude,
Information
aka. The SHELLI
The
Shellfish Harvest Extent, Latitude, Longitude Information (hereafto
referred as ‘SHELLI’) is an application that allows the CSSP staff to:
·
Look at the different layers within the CSSP
·
Add or remove data from the database
·
Notify other CSSP staff that a change has
occurred
This
user manual will outline the different aspects of the SHELLI and how they
function. Please jump to the appropriate chapter of interest.
Table of
Contents
7. Core workflow 4 : Initiate Revocation
8. Core workflow 5 : Concur Revocation
9. Core Workflow 6 : Complete Revocation
10. Core workflow 7 : Create VO
11. Core workflow 8 : Delete VO
12. Launching the public website
1. Design and access
The SHELLI is an
application that includes:
·
a series
of data layers,
·
configuration
files hosted on a DFO It server,
·
map
documents projecting the data,
·
2 internal
websites for CSSP staff
·
2 public
websites
·
A series
of modules to interact with the data
Live environment
The live environment
can be accessed following these links:
|
Internal website |
|
|
Public website |
https://www.dfo-mpo.gc.ca/shellfish-mollusques/cssp-map-eng.htm https://www.dfo-mpo.gc.ca/shellfish-mollusques/cssp-map-fra.htm |
The SHELLI is designed
for the desktop interface, using MS Edge and Google Chrome. There currently is
no interface adapted to mobile or tablet use.
Test environment
The SHELLI also has a
testing environment. Users can access it using one of the supplied login
credentials and practice any aspect of the Live environment. Note that this
space is designed to be unstable. Disconnections and difficulty loading
elements is expected.
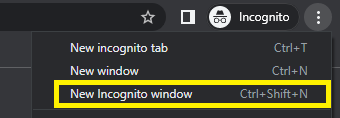
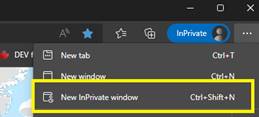
N.B. Users must use a web browser’s
incognito mode in order to access the test environment. Failure to do so can
accidentally load the live environment cached in the browser.
|
Tier 1 access – GC
key |
|
|
GC Key |
TESTPacific TESTQuebec TESTGulf TESTMaritimes |
|
Password |
Please contact an
ADMIN for the password |
|
Q1 Favourite teacher |
Trudeau |
|
Q2 Favourite subject
in school |
Malacology |
|
Q2 favourite game |
Aquaculture |
|
Tier 2 access - DFO
ArcGIS Portal |
|
|
User Name |
TESTECCC TESTCFIA TESTPacific TESTQuebec TESTGulf TESTMaritimes TESTNFLD |
|
Password |
Please
contact an ADMIN for the password |
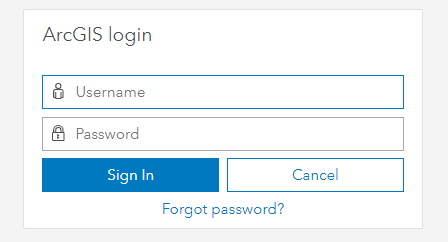
N.B. if the user gets disconnected and sees this screen :
 ,
,
The user must re-enter the URL, or close the
browser and start all over. Navigating back to the SHELLI via this menu will
attempt to launch the Live environment.
1.1
Launching
the internal website
Tier 1 access (viewing
the data)
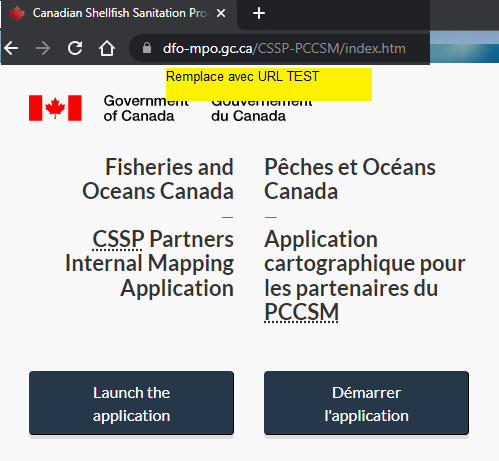
1. Enter the URL (live
or test environments)
2. Continue to GC Key
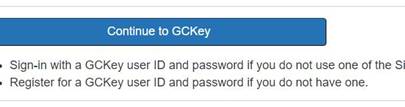
3. Enter the GC Key
credentials
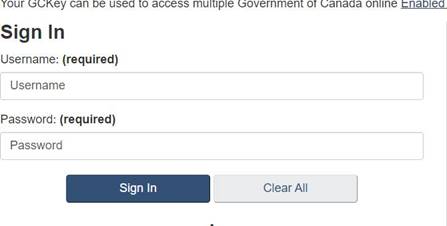
4. Answer the security
question if it comes up
5. The base site will
load the map and data layers. Tier 1 access complete
Tier 2 access (ability
to modify the data)
1. After finishing
tier 1 access, click on the sign in button on the top right

2. Select the
Fisheries and Oceans option
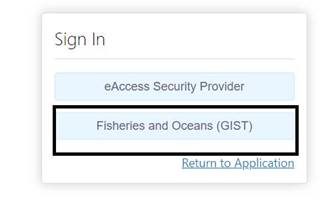
3. Enter the tier 2
credentials

4. The map should reload, however now the
‘login’ button will be replaced with a sign out button. Clicking on the chevron
will display your user name.
2. Permissions
The SHELLI has a permissions scheme that will
slightly modify the user experience.
Each tier 2 user is assigned an ‘agency’. There
are four agencies:
·
ADMIN
·
CFIA
·
ECCC
·
DFO
Additionally each user is assigned a set of
‘regions’. There are five regions:
·
Pacific
·
Quebec
·
Gulf
·
Maritimes
·
Newfoundland
A user must belong to one agency and a set of
regions.
2.1
Workflow
access
Access to the workflows depends on the user’s
agency. A user will be able to see all the workflows, and try to run them.
However the workflow will immediately exit if the user does not have permission
to continue.
|
Workflow Name |
CFIA |
ECCC |
DFO |
|
C1: Submit |
X |
X |
X |
|
C2: Review |
|
|
X |
|
C3: Activate |
|
|
X |
|
C4: Initiate Revocation |
X |
X |
X |
|
C5: Concur Revocation |
X |
X |
X |
|
C6: Complete Revocation |
|
|
X |
|
C7: Create VO |
|
|
X |
|
C8: Delete VO |
|
|
X |
2.2
Reason
Code Rationale
Below is the rationale behind each reason code.
1. Biotoxin
/ Biotoxines
Closure following the observation of high
levels of biotoxin(s)
Long term closure of an area with a known
history of high toxicity
High biotoxin events and deviations from
sampling (long or short term, planned or unplanned)(CSSP 4.2.1) (Pacific
region)
Used by/utilisé par : CFIA / DFO
2. Cessation of Biotoxin monitoring / Arrêt de suivi des biotoxines
Short
term closure due to lack of sampling : end of season (aquaculture areas), impossible to sample on a regular basis (bad
weather, samplers unavailable, etc.)
Used by/utilisé
par : CFIA / DFO
3. Chemical
/ Chimique
This code is used when chemical contaminants
are discharged or present in a shellfish area.
Used by/utilisé
par : CFIA / ECCC / DFO
4. Sanitary (conditionally managed area /
Pollution sanitaire (géré sous condition)
The conditions for harvesting safe shellfish
in a conditionally managed area are not met, such as:
• a
wastewater treatment plant or collection system fails or is bypassed
• a
rainfall threshold is exceeded
• the
water quality has deteriorated with a change in season
Used by/utilisé
par : ECCC/DFO
5. Sanitary (emergency) /
Pollution sanitaire (urgence)
An emergency situation includes unusual
weather, flooding, spills of sewage.
· Significant
meteorological phenomenon (eg heavy precipitation).
· Municipal wastewater unplanned discharge
· Pathogenic Illness
Used by/utilisé par : CFIA/ECCC/DFO
6. Sanitary (shellstock)
/ Pollution sanitaire (stock de mollusque)
Closure caused by unacceptable
microbiological sample results in shellfish (CSSP sections 6.3 and 6.4)
Used by/utilisé par : CFIA/ECCC/DFO
7. Sanitary (water quality or pollution source) / Pollution sanitaire (qualité de l’eau ou source de pollution)
The
concentration of fecal coliforms in seawater exceeds the criteria of the CSSP. Presence
of bacteriological sources of pollution.
Used by/utilisé
par : ECCC/DFO
8. Conservation
Assigned to other closure types on the SHELLI
map related to conservation
Used by/utilisé par : DFO
2.3
Revocation Permission Grid
The revocation
workflows follow a specific permission process. If CFIA initiates a revocation,
then ECCC must concur, and vice versa (see the grid below). DFO can initiate
and concur any prohibition order. The Revocation workflows restrict what is
displayed based on the combination of reason code and region associated with
the user’s permissions. In the event that a user from CFIA or ECCC attempt to
concur a prohibition already initiated by someone else from their own agency,
an error message will appear.
|
# |
Reason |
CFIA initiates |
ECCC initiates |
CFIA must concur |
ECCC must concur |
|
1 |
Biotoxin |
yes |
|
|
|
|
2 |
Cessation of
biotoxin monitoring |
yes |
|
|
|
|
3 |
Chemical |
yes |
Yes |
Yes |
yes |
|
4 |
Sanitary
(cond. Managed) |
yes |
yes |
yes |
yes |
|
5 |
Sanitary
(emergency) |
yes |
yes |
yes |
yes |
|
6 |
Sanitary (shellstock) |
yes |
|
|
yes |
|
7 |
Sanitary
(water quality / pollution) |
|
yes |
Yes |
|
|
8 |
Sanitary and
Biotoxin |
yes |
yes |
Yes |
yes |
3. 
Internal interface
The internal interface has many elements that
allow you to interact with the map.
The main tool bar ‘tools’ includes the default
features to click and extract data. Of particular importance is the layer list,
where you can change what is displayed on the map. Check the Layers pane and
interact with each layer and sub layer as needed.
The Prohibition Orders tab houses the launch
point of the 6 Prohibition Orders modules
The Variation Orders tab houses the launch
point of the 2 Variation Order Modules
The Management tab houses the launch point of
the Management Module.
4. Core workflow 1 : Submit
The submit workflow is used by CFIA, ECCC, or
DFO
This workflow allows the user to submit a
recommendation for a new Prohibition Order.
|
Step |
Description |
||||
|
0. Setup |
Select the Prohibition Orders…
tab |
The Prohibition Orders tab shows the
6 workflow buttons Select ‘submit’ to start the
workflow. All querries
restricted to Regions associated with user. |
|||
|
|
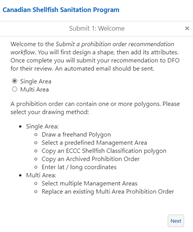
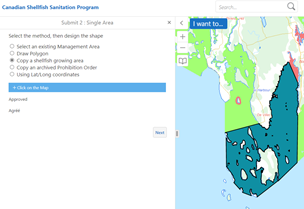
This is the launch menu, it provides
a brief overview how to proceed. The Submit workflow has two branches to
follow, either a single area submission or a multi area submission. Select the option you prefer and
click next to proceed. |
||||
|
2. Draw
Single |
|||||
|
Click on Map
|
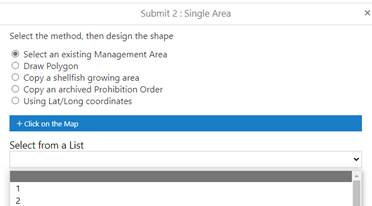
After selecting “single area”, you are brought to this menu. Changing the selected radio button
will change which sub menu is visible. The default option is to select an
existing management area (from polygons stored in the Management Area
database). Options called up are based on user’s
region permissions. You can either click on the map, or
select from the list. Clicking on the map adds a token to
display. Adds markup polygon + details to user interface Selecting an option in the drop down
will auto populate the list of sectors. Clicking on an item in the list will
zoom to the location, add a markup polygon, and add details. |
||||
|
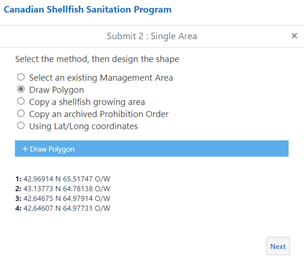
Click draw polygon
|
Draw polygon option. The menu items will change. Click the
blue button ‘Draw Polygon’, and then click at multiple points on the map. Once the sketch is completed, it is
removed and replaced with a markup polygon. The coordinates of the vertices are added
to the display. |
||||
|
Click on map
|
Selecting this option allows you to
copy a classification polygon supplied by ECCC. Click on the blue button and then
click on themap. A token is placed on the map and reproduces
a polygon in the ECCC classification layer. The classification of this polygon is
added to the menu. |
||||
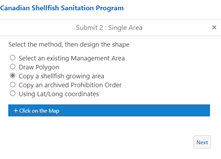
|
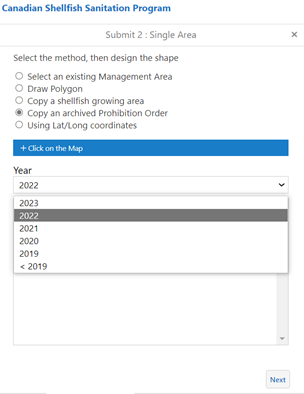
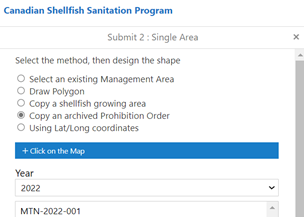
|
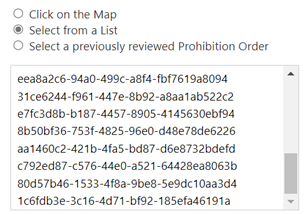
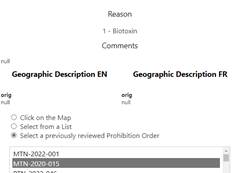
Selecting this option allows you to
reproduce a previously issued prohibition order. You may either click on the map or
select from a list. By clicking on the map, a token is placed
on the map and reproduces the first polygon found in the PO archive as a
markup polygon. Data from archive is copied over to
the session. Alternatively you can select the year
the prohibition order was issued from the year dropdown menu. Clicking on the
listed Prohibition Order will copy it from the archive and add it to the map.
|
||||
|
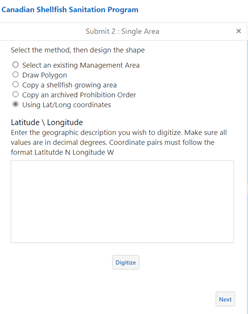
|
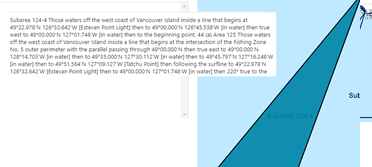
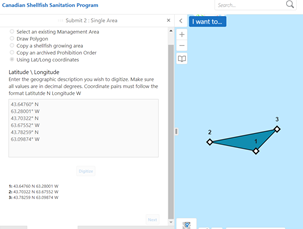
Selecting this option adds a text
area and a ‘digitize’ button. Input a series of coordinate pairs,
or an entire paragraph containing a geographic description. Click digitize to add a polygon using
these coordinates. The coordinates must be written in
decimal degrees, with latitude first and longitude second. N and O or W must
be used to denote latitude and longitude respectively. n.b. French spelling using commas to denote decimal places
won’t work. Replace commas with periods. |
||||
|
|
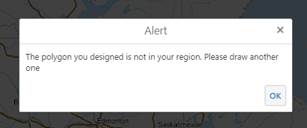
If the drawn polygon has its centroid
in a location that is not in the region associated with the user, this alert
appears. |
||||
|
3. Attributes |
|||||
|
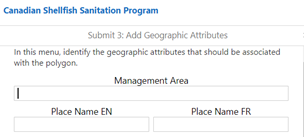
|
If the submission is drawn using a
predefined management area or an archived prohibition order then these fields
will be already filled in. Fill in the details as required, or
leave them blank. |
||||
|
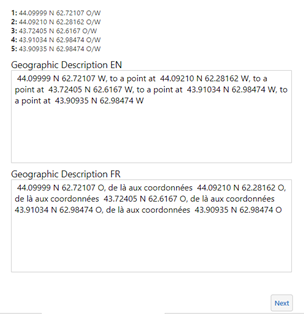
|
If the polygon already has geometry
information, it will be reproduced here in the English and French
descriptions. Otherwise fill them in as much as
possible. |
||||
|
Multi Area PO |
|||||
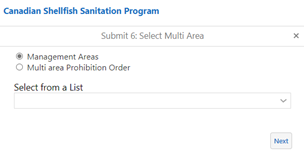
6. Draw Multi Area PO |
|
If you selected ‘draw using a multi are a prohibition order’ in menu 1, you will see this menu next. Two options are on offer, either drawing a prohibition order based on existing management areas, or by an existing multi area prohibition order. |
|||
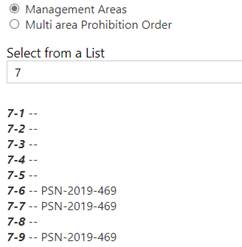
6.1 Select from a list of Management Areas |
Use drop down to select from list,
|
Selecting an area populates all of the subareas in a list, with an indication if there is an active Prohibition Order in the management area or not. |
|||
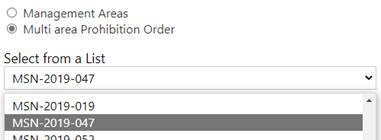
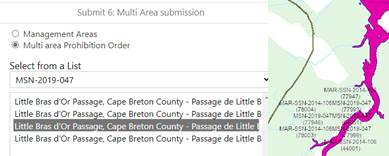
6.2 Select from a Multi Area prohibition Order |
Click next |
Selecting this option populates the drop down list with multi area prohibition orders found in the user’s region. Then a list will display all polygons contained within this multi area PO, and list them by place name EN and FR Selecting the item will zoom to the location |
|||
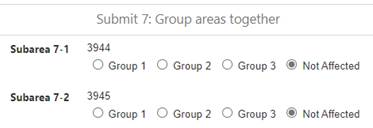
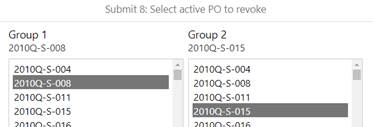
7 Assign Group |
|
Now the user must group together all the selected polygons to build a submission. A grid appears to assign the polygons into groups. By default all polygons are assigned the ‘not affected’ option. You can select which group to assign each polygon. In the following menu’s you will be able to assign a reason code and species list to each group. Once completed, the software will colour each polygon based on the assigned group. Unaffected polygons are given a translucent white colour and not stored in the temporary dataset. Clicking next will allow you to modify the geometry attributes in step 3. |
|||
|
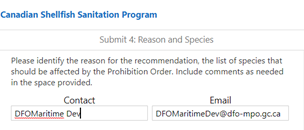
4. Species |
|||||
|
Contact information should match the
login information |
This menu will allow you to assign a
reason code and define the species list for the submission. The User Name and Email supplied here
based on your user credentials. |
||||
|
Hidden if step 2 completed, visible
if step 6 completed (see table 2) |
|||||
|
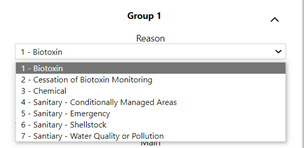
|
Drop down with reason code options. Select
the reason for creating this submission. The list of reason codes differs
based on the user permissions. Consult the Permissions section for more
details. |
||||
|
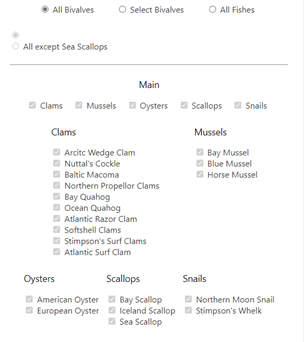
|
You may now modify the list of
species included in the submission. The final list is solely based on which
species is checked or unchecked. However, selecting the ‘all bivalves
option’ will automatically check off all the species. This is the default
option. Selecting one of the category options
(clams, Mussels, Oysters, Scallops, Snails) will check or uncheck all the
species in this category. |
||||
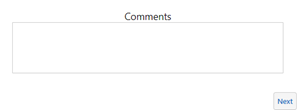
|
|
Enter the comments explaining why the
submission is being done. Each RISC has its own protocol for what should get
entered here. Your name and the date will
automatically be added afterwards. |
||||
|
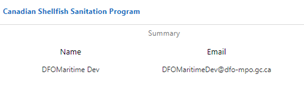
5. Summary |
|||||
|
|
This menu will reproduce what has
been stored in the app memory prior to updating the database. If there are
any mistakes you can restart and wipe the temporary data entry. |
||||
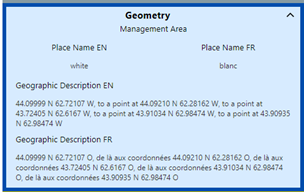
|
|
This menu outlines the geometry
attributes entered. |
||||
|
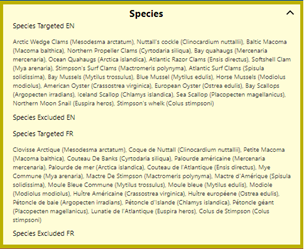
|
This submenu outlines the species
list included in the submission. |
||||
|
|
This submenu outlines whether a
revocation will be initiated as a consequence to issuing this prohibition
order. |
||||
|
|
If a prohibition order should also be
revoked in conjunction with this submission. Clicking the ‘revoke’ button in
the previous menu will bring you here. You will be shown a list (per
submission group), where you may select the name of the prohibition order to
revoke. This will mimic the initiate
revocation step. |
||||
|
9. End
sequence |
|||||
|
|
If you click ‘submit’ at the summary screen, the temporary
data will be written to the database. A pop up appears if this is successful.
|
||||
|
|
After writing to the database, the application will now
process the initiate revocation step if there is one. Then it will build the
subscriber list and generate the automated e-mail. The temporary memory is cleared,
and the map is reset. Once all this is done, a success popup appears. |
||||


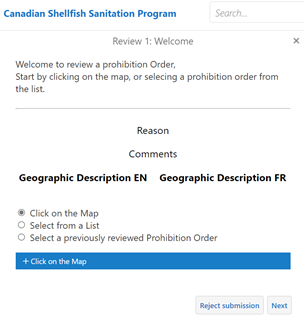
5. Core workflow 2 : Review
In this workflow you can review a submission
completed at the ‘submit’ step. You will add other details like correcting the
geographic description, defining the signing authority, and outlining the
issuance and enforcement dates.
|
Step |
Description |
||||
|
0. Setup |
Select the ‘review’ button in the
prohibition orders tab. |
The review workflow will run. If you
don’t have permission to proceed a popup will appear and the workflow will
close. |
|||
|
|
In the first menu you can pick one of
three options to proceed. Select the one you wish before proceeding. |
||||
|
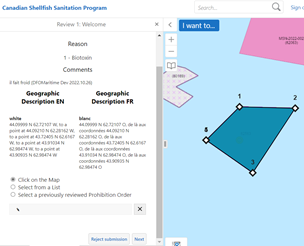
|
If you select ‘click on map’, you may
click on the blue button and select the submission prohibition order on the
map. You will
place a token on the map. A polygon is added to the display, and attributes are added to the display. |
||||
|
|
If you select this option a list will
appear with all of the submissions associated with your region. These are
closure GUID’s which identify prohibition order submissions. Clicking on an item will center the
map and add markup outlining the submission. Attributes are added to the display. |
||||
|
|
Clicking on items in the list will
center the map on the selected geometry. Attributes are added to the
appropriate field. Changing selection will change attributes |
||||
|
|
Clicking button makes a popup appear
to confirm rejection. If yes, polygon is deleted, cannot be selected again. |
||||
|
2. Reshape |
|||||
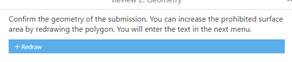
|
|
You can now reshape the supplied
geometry. This drop down menu is hidden if only one polygon is in the
submission. Otherwise select the polygon you wish to redraw. |
||||
|
|
Click on the blue button and then
redraw the polygon on the map. A popup appears after you are done to confirm
the sketch. The two shapes will be merged together. |
||||
|
|
By default this menu is greyed out.
If you want to revoke a prohibition order in tandem to the current submission
select ‘yes’. Then scroll through the list and
select the desired Prohibition Order number. When clicking on an tiem, the map will zoom to the location in question and
add markup to the map. |
||||
|
Once you click ‘next’ the app will
perform two major operations. First, if the supplied polygon needs
to be cut along the coastline, it will run the clipping algorithm. This will
overlay the reference land layer and remove all intersection with ‘land’.
Once the clip is completed, new coordinates will be calculated and replace
the supplied geographic description. Second, the application will now
calculate the appropriate Prohibition Order Number. This will be generated
based on the reference PO Timeline table, calling up the list of all
Prohibition Orders issued so far this year, and computing the next one in the
list. It will then construct the number by extracting the first letter of the
DFO Region’s name, adding the letters TN for biotoxin related prohibitions,
CH for chemical related prohibitions and SN for sanitary related
prohibitions, add in the current year, and finally the document in sequence. |
|||||
|
3. Attributes |
|||||
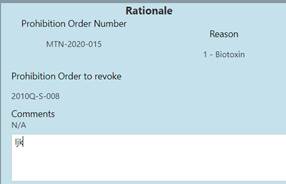
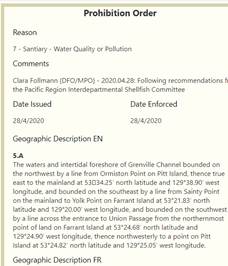
|
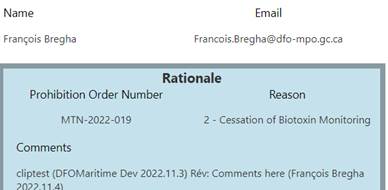
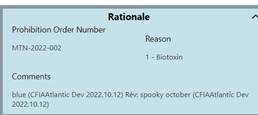
|
The rationale for the prohibition is
displayed. You will see the reason code, the computed prohibition order, the
PO flagged for revocation, and the comments supplied at the Submit step. Please include your comments based on
the review. |
||||
|
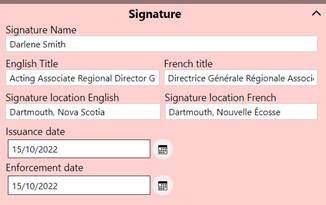
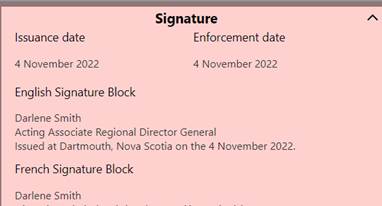
|
In the Signature sub-menu, you are
asked to include details on the signature block. The Signature Name is an autocomplete
form. As you type the desired name, it will search the database and autopopulate if it finds the name in the SHELLI database. Otherwise you can write the desired
name, title, and location. You must then define the issuance and
enforcement dates. By default the enforcement date is the same as the chosen
Issuance date. Click the calendar to open up a date menu, or write the date
directly in the format DD/MM/YYY |
||||
|
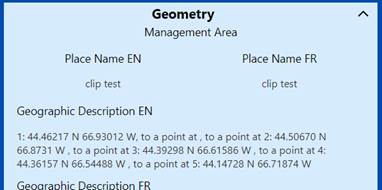
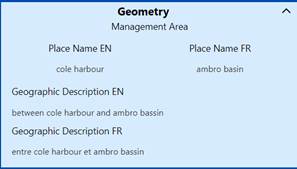
|
In this submenu you can rewrite the
geographic details. The details stored in the database
are pre-populated, and you can rewrite them at will. |
||||
|
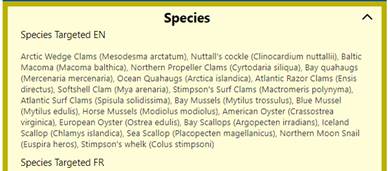
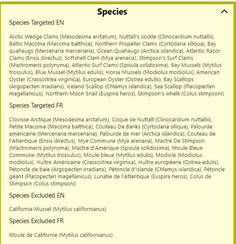
|
In this sub-menu you will see the
list of species affected by the prohibition order. You may modify this list by checking
or unchecking any item on the list. Selecting the ‘All Bivalves’ option
has two effects. 1. IT will add this phrase to the
longform species description. 2. It will cause the final polygon to
display with an opaque red to the general public. Not selecting this option will
instead omit the phrase, and cause the polygon to display with a red and
transparent hatching. |
||||
|
Once you click next the application
will perform two major operations. First it will calculate the dates
based on the chosen Issuance and Enforcement dates. The output is a text string
(day month year) in both languages, as well as the final datestamp
to be added to the database. Second it will run the pdf
generators. These will create a preview of the prohibition orders available
in the next menu. Each pdf generator can take a while, loading times vary
based on your connection to the server. |
|||||
|
4. Summary |
|||||
|
|
In this menu you will see the data
entered so far. If there are any errors, you can start over by clicking the
‘Restart’ button. In this sub-menu you will see the
details of the rationale. |
||||
|
|
In this sub-menu you will see the
details of the Signature |
||||
|
|
In this sub-menu you will see the
details of the Geometry |
||||
|
|
In this sub-menu you will see the
details related to the species. |
||||
|
|
In this sub-menu you will see details
related to the revocation. Clicking next will imitate the
‘Initiate Revocation’ workflow for the selected prohibition order. |
||||
|
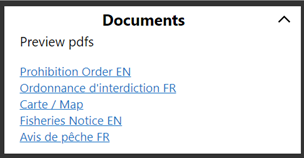
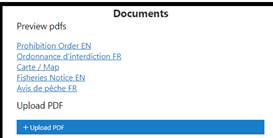
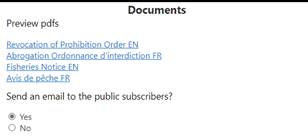
|
In this sub-menu you can preview the
pdfs generated. Click on the hyperlink to open a new
tab and download the generated pdf. There are five supplied links to
investigate. If no pdf is generated, the link will
simply open the internal map. |
||||
|
5. End
sequence |
|||||
|
|
If you click ‘submit’ at the summary
screen, the temporary data will be written to the database. A pop up appears
if this is successful. |
||||
|
|
|
After writing to the database, the
application will now process the initiate revocation step if there is one.
Then it will build the subscriber list and generate the automated e-mail. The
temporary memory is cleared, and the map is reset. Once all this is done, a
success popup appears. |
|||


6. Core workflow 3 : Activate
In this workflow you get to review the
Prohibition Order once last time before it is issued.
|
Step |
Description |
||||
|
0. Setup |
Select the ‘Activate’ Button in the
Prohibition orders tab. |
||||
|
1. Intro |
|||||
|
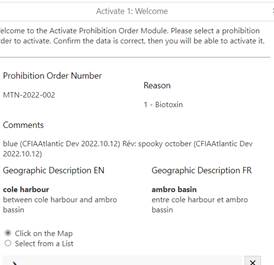
|
In this menu you can select the
Prohibition Order to activate. By default you can click on the map.
Select the blue button and click on the desired polygon to activate. Markup
is added onto the map confirming your selection. Rationale attributes are
added to the menu to tell you what is associated with this polygon. |
||||
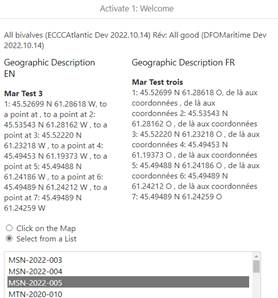
|
|
Alternatively you can select by a
list. A list of all Prohibition Orders ready to be activated is displayed,
and you can select the desired one. Markup is added onto the map
confirming your selection. Rationale attributes are added to the menu to tell
you what is associated with this polygon. |
||||
|
2. Last
Review |
|||||
|
|
In this summary menu you can see the
details of the prohibition order. This sub-menu will display the
rationale of the Prohibition Order. |
||||
|
|
This sub-menu will display the
signature information of the Prohibition Order. |
||||
|
|
This sub-menu will display the
geometry information of the Prohibition Order. |
||||
|
|
This sub-menu will display the
species information associated with the prohibition order. |
||||
|
|
This sub-menu will display if a
revocation is done in consequence to issuing this prohibition order. If so, don’t forget to complete the
revocation workflows to finish processing the polygon! |
||||
|
2.6 ReReview |
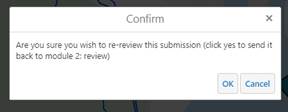
|
If there are errors, you can click
the re-review button. Doing so will cause the prohibition order to be flagged
for the ‘review step’. You can then load the review workflow and complete all
the steps another time. |
|||
|
The application will now build pdfs
associated with this prohibition order based on the supplied information. |
|||||
|
3. Activate |
|||||
|
|
Completing the activate prohibition
order workflow sends emails to two lists : the internal subscription and
public subscription. If you select the ‘no’ option here,
the public email will be suppressed and no notification will be sent. By
default the ‘yes’ option is selected. |
||||
|
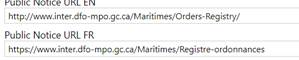
|
The reference URL is supplied here.
Each region has a different default stored in the database. |
||||
|
|
The pdf preview is shown in this
sub-menu. Click on the hyperlink to open a new browser tab to display the
generated pdf. IF you wish to upload a pdf of the
final prohibition order you can. It will replace the autogenerated one
displayed in the hyperlinks. If no pdf is generated, clicking on
the hyperlink will simply open the internal map in a new tab. |
||||
|
4. End
sequence |
|||||
|
|
If you click ‘submit’ at the summary screen, the temporary
data will be written to the database. A pop up appears if this is successful.
|
||||
|
|
After writing to the database, the application will build
and send the emails. The temporary memory is cleared, and the map is reset.
Once all this is done, a success popup appears. |
||||


7. Core workflow 4 : Initiate Revocation
In this workflow you may initiate the
revocation of a prohibition order.
|
Step |
Description |
|||||
|
0. Setup |
Select the ‘Initiate Revocation’
button from the prohibition orders tab. |
|
||||
|
1. Intro |
||||||
|
|
Your experience will change based on
the permissions associated with your account. CFIA, ECCC, and DFO have
different abilities to initiate a revocation. For more details please see the
permissions section of this manual. |
|||||
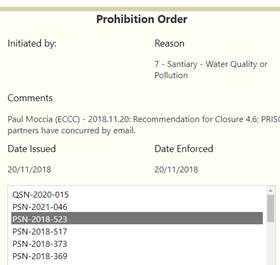
|
|
By default you can click on the map.
Click the blue button and then place a token on the map. If a valid polygon can be selected, a
markup polygon is added and some of the attributes are displayed in the menu. |
|||||
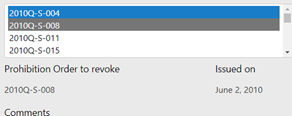
|
|
You can also select from a list of
all activated prohibition orders. Select the desired prohibition order,
the map will zoom and add markup on the map. Attributes contained in this
record are displayed in the menu. |
|||||
|
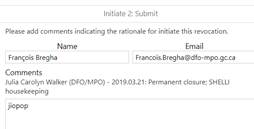
2. Submit |
||||||
|
|
In this menu you must add your
comments to the prohibition order. Explain why you wish to initiate the
revocation. The comments already contained are displayed on the screen, as
well as your username and e-mail. |
|||||
|
3. End
sequence |
||||||
|
|
If you click ‘submit’ at the summary
screen, the temporary data will be written to the database. A pop up appears
if this is successful. |
|||||
|
|
After writing to the database, the
application will build and send the emails. The temporary memory is cleared,
and the map is reset. Once all this is done, a success popup appears. |
|||||


8. Core workflow 5 : Concur Revocation
All prohibition orders require a mix of
initiation and concurrence in order to be removed from the map. This workflow
will allow you to concur a prohibition order that has passed the initiate
revocation step.
|
Step |
Description |
||||
|
0. Setup |
Select the ‘Concur Revocation’ button
from the Prohibition Orders tab. |
||||
|
1. Intro |
|||||
|
|
Your experience will change based on
the permissions associated with your account. CFIA, ECCC, and DFO have
different abilities to initiate a revocation. For more details please see the
permissions section of this manual. |
||||
|
|
You can select from a list of all
‘initiated’ prohibition orders. Select the desired prohibition order,
the map will zoom and add markup on the map. Attributes contained in this
record are displayed in the menu. |
||||
|
2. Submit |
|||||
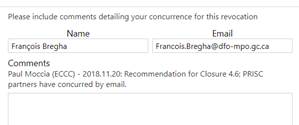
|
|
In this menu you must add your
comments to the prohibition order. Explain why you wish to concur the
revocation. The comments already contained are displayed on the screen, as
well as your username and e-mail. |
||||
|
3. End
sequence |
|||||
|
|
If you click ‘submit’ at the summary
screen, the temporary data will be written to the database. A pop up appears
if this is successful. |
||||
|
|
After writing to the database, the
application will build and send the emails. The temporary memory is cleared,
and the map is reset. Once all this is done, a success popup appears. |
||||

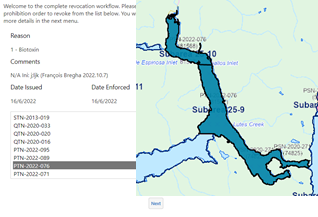
9. Core Workflow 6 : Complete Revocation
In this workflow you can finalise the details
of the revocation. Once completed the prohibition order data will be migrated
to the archive, and removed from the main display.
|
Step |
Description |
||||
|
0. Setup |
Select the ‘Complete Revocation’ from
the prohibition orders tab |
||||
|
1. Intro |
|||||
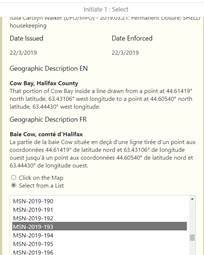
|
|
You can select from a list of all
‘concurred’ prohibition orders. Select the desired prohibition order,
the map will zoom and add markup on the map. Attributes contained in this
record are displayed in the menu. |
||||
|
2. Details |
|||||
|
|
In this section define the date the
revocation will take place, and the date it comes into force. By default the
current system date is added. If you want to modify, either type in a new
date, or select one by clicking on the calendar button. |
||||
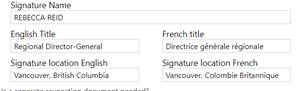
|
|
The Signature Name is an autocomplete
form. As you type the desired name, it will search the database and auto
populate if it finds the name in the SHELLI database. Otherwise you can write the desired
name, title, and location. |
||||
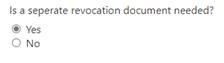
|
|
If this is a stand
alone revocation, then a revocation pdf must be generated. Select the
yes option. However if a prohibition order is
being activated which also revokes another one in consequence, then a stand alone pdf is not needed. In this case, you must
complete the digital transaction to match what has been done on paper. Select
the ‘no’ option. |
||||
|
Once you click next the application
will perform two major operations. First it will calculate the dates
based on the chosen Issuance and Enforcement dates. The output is a text
string (day month year) in both languages, as well as the final datestamp to be added to the database. Second it will run the pdf
generators. These will create a preview of the prohibition orders available
in the next menu. Each pdf generator can take a while, loading times vary
based on your connection to the server. |
Converts user
input (Unix time) into text strings EN and FR for Date Revoke is Issued, and
date Revoke comes into force. |
||||
|
3. Summary |
|||||
|
|
This sub-menu will show the rationale
associated with the prohibition order. |
||||
|
|
This sub-menu will show the signature
details associated with this revocation. |
||||
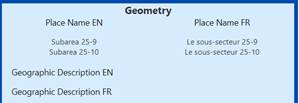
|
|
This sub-menu will show the geometry
details associated with this prohibition order. |
||||
|
|
The pdf preview is shown in this
sub-menu. Click on the hyperlink to open a new browser tab to display the
generated pdf. If no pdf is generated, clicking on
the hyperlink will simply open the internal map in a new tab. Completing the complete revocation
workflow sends emails to two lists : the internal subscription and public
subscription. If you select the ‘no’ option here,
the public email will be suppressed and no notification will be sent. By default
the ‘yes’ option is selected. |
||||
|
4. End
sequence |
|||||
|
|
If you click ‘submit’ at the summary screen, the temporary
data will be written to the database. A pop up appears if this is successful.
|
||||
|
|
After writing to the database, the application will build
and send the emails. The temporary memory is cleared, and the map is reset.
Once all this is done, a success popup appears. |
||||

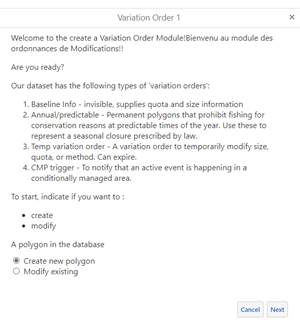
10. Core workflow 7 : Create VO
This workflow will allow you to add or modify
polygons stored in the variation order database.
There are four types of polygons in this
dataset:
1- Baseline polygons, whose purpose is to
identify typical size and quota limits for each species
2 – Annual or seasonal closure polygons, whose
purpose is to represent regularly re-occuring
conservation closures prescribed by a statute or some management plan
3 – Variation Order polygons, which are meant
to represent actual variation orders. These should be used for short notice and
limited duration variations for conservation purposes
4 – CMP trigger events, which are meant to represent a wastewater discharge. These should be used when DFO wants to show that an active wastewater discharge is occurring on the public interface.
|
Step |
Description |
||||
|
0. Setup |
Select the ‘Create VO’ button from
the Variation Orders tab. |
||||
|
1. Start |
|||||
|
1.1 select new or existing |
|
In this menu you can choose whether
to create a brand new polygon or modify an existing one. The menus in the Modify Existing
option are described in step 5. |
|||
|
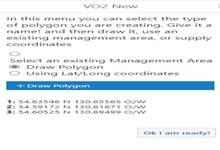
2. New Polygon |
|||||
|
2.1 Select MGMT Area |
|
The first step is define the geometry
of the polygon. You can select an existing management
area either by clicking on the map or selecting from the list. Click the blue button, and then place
a token on the map. If a mangemetn area is present,
it will be copied and some temporary markup is added to the map. The
geographic description will display in the menu. The dropdown menu shows the list of
management areas. Select the one of interest. Then click on the desired
sector. The screen will zoom to the location, and add the temporary markup to
the display. The geographic description is added to the menu. |
|||
|
2.2 Draw Polygon |
|
You can draw the polygon. To do so
click on the blue button and then click on the map. A polygon will appear. Once completed, temporary markup is
added to the map and the coordinates are added to the menu. |
|||
|
2.3 Using Lat Long coordinates |
|
Selecting this option adds a text
area and a ‘digitize’ button. Input a series of coordinate pairs,
or an entire paragraph containing a geographic description. Click digitize to add a polygon using
these coordinates. The coordinates must be written in
decimal degrees, with latitude first and longitude second. N and O or W must
be used to denote latitude and longitude respectively. n.b. French spelling using commas to denote decimal places
won’t work. Replace commas with periods. |
|||
|
2.4 Clip, add
coordinates |
Once you click ‘next’ the application
will clip the polygon. If the supplied polygon needs to be
cut along the coastline, it will run the clipping algorithm. This will
overlay the reference land layer and remove all intersection with ‘land’.
Once the clip is completed, new coordinates will be calculated and replace
the supplied geographic description. |
||||
|
3. Attributes |
|||||
|
3.1 Rationale |
|
In this menu you can now define the
attributes of the Variation Order. Indicate if the polygon is active or
not. Inactive polygon will not be displayed to the public. Assign a polygon type from the four
options. Give the polygon a name. Determine the Start and End date. A
polygon is only visible if the current time is between the Start and End
dates. Add comments as needed to explain the
rationale. |
|||
|
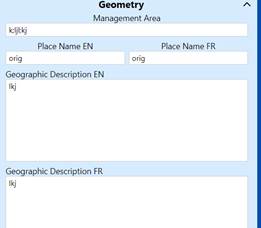
3.2 Geometry |
|
In this sub-menu you can define the
geometry attributes. These fields are pre-populated with data supplied from
the database. You can rewrite them as needed. |
|||
|
4. Species |
|||||
|
You
must now add attribute information for each species. Each sub-menu is
identical, save for the species in question. You must repeat the s.4 steps
for each species. |
|||||
|
4.1 Target |
|
Select the target of this polygon.
The options are the commercial harvest, recreational harvest, both
recreational and commercial harvest, or not affected for this species. By default Not affected is selected. Changing the selection will enable
data entry in the other parts of this menu. |
|||
|
4.2 Size and Quota |
|
Define the size and quota information
for this species associated with this polygon. Enter numbers here, the units
will be supplied by the database. |
|||
|
4.3 Method |
|
Identify the method restrictions
associated with this species. By default all methods are prohibited, however
you can select the ‘some’ option and then check or uncheck the desired
methods. |
|||
|
5. Modifying Existing |
|||||
|
5.1 Click on Map |
|
You can click on the map. To do so
click on the blue button and then place a token on the map. If a valid
polygon is selected, temporary markup is added to the display. |
|||
|
5.2 Select from List |
|
You can select from a list. A
dropdown menu appears, select the desired polygon type. Then a list of all
polygons of that type in your region will appear. Clicking on the item will
zoom to the location and add temporary markup. Once complete you will move to step 3
and 4 to finish completing this workflow. |
|||
|
6. Summary |
|||||
|
6.1 Rationale |
|
This sub-menu will reflect the
rationale associated with this polygon. |
|||
|
6.2 Geometry |
|
This sub-menu will repeat the
geometry details associated with the polygon. |
|||
|
6.3 Species |
|
This sub-menu will repeat the species
information associated with the polygon. |
|||
|
7. End Sequence |
|||||
|
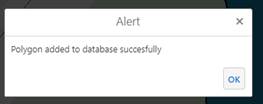
|
If you click ‘submit’ at the summary
screen, the temporary data will be written to the database. A pop up appears
if this is successful. |
||||
|
|
After writing to the database the
temporary memory is cleared, and the map is reset. Once all this is done, a
success popup appears. |
||||


11. Core workflow 8 : Delete VO
This workflow allows you to modify or remove
polygons in the Variation Order database. It is meant to be a short and quick
way to remove them from public view.
|
Step |
Description |
||||
|
0. Setup |
Select ‘Delete VO’ from the Variation
Orders menu |
||||
|
1. Deactivate |
|||||
|
1.1 Click on map |
|
You can click on the map. To do so
click on the blue button and then place a token on the map. If a valid
polygon is selected, temporary markup is added to the display. |
|||
|
1.2 Select from list |
|
You can select from a list. A
dropdown menu appears, select the desired polygon type. Then a list of all
polygons of that type in your region will appear. Clicking on the item will
zoom to the location and add temporary markup. |
|||
|
2. Delete |
|||||
|
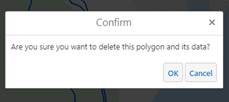
2. Delete |
If you want to permanently delete the
polygon, click the ‘delete’ button. A confirmation pop up appears. If you
confirm, the polygon is permanently deleted. |
||||
|
3. Deactivate |
|||||
|
3.1 Polygon status |
|
Select the desired status of the
polygon. If active = no, then the polygon will never be displayed to the
public. |
|||
|
3.2 Date |
|
The dates stored in the database are
supplied. Modify them as needed to change the issuance, start, and end dates. |
|||
|
4. End Sequence |
|||||
|
|
If you click ‘submit’ at the summary
screen, the temporary data will be written to the database. A pop up appears
if this is successful. |
||||
|
|
After writing to the database the
temporary memory is cleared, and the map is reset. Once all this is done, a
success popup appears. |
||||
12. The Public website
The public website is
accessible here:
En: https://www.dfo-mpo.gc.ca/shellfish-mollusques/cssp-map-eng.htm
FR : https://www.dfo-mpo.gc.ca/shellfish-mollusques/cssp-map-fra.htm
It displays the
following data layers:
A map of Canada
(supplied by NRCan)
The ECCC water quality
classification layer
-
Approved
and conditionally approved polygons are green
-
Restricted,
Conditionally Restricted, and Prohibited polygons are red
The Prohibition Order
layer
(if the current day is
after the enforcement day)
-
Prohibition
orders targeting ‘all bivalves’ are red
-
Prohibition
orders not targeting ‘all bivalves’ are cross hatched red
The Archived
Prohibition Order Layer
(if the current day is
before the revocation enforcement day)
-
Prohibition
orders targeting ‘all bivalves’ are red
-
Prohibition
orders not targeting ‘all bivalves’ are cross hatched red
The Variation Order
Layer
(if the polygon is ‘active’
and the current day is in between the start and end dates)
-
Baseline
polygons are invisible
-
Annual
polygons are red
-
Variation
order polygons are red
-
CMP
trigger event polygons are cross hatched yellow and black
The Management Area
layer
-
![]() All polygons are a purple outline with the name
of the management area in the middle
All polygons are a purple outline with the name
of the management area in the middle